Set out in seven parts
Service 10 · Selection room · Malvern
Kitchen tiling, set out long before anything is stuck down
Tiling is the trade where the important work happens with a straight edge, a level and a chalk line. Where the first full tile lands, how the joints meet the cabinetry, whether the floor runs under the kitchen or up to it — those are drawn decisions, and they are why one tiled wall reads calm and another reads busy. This page covers floor and wall tiling for kitchens in Malvern and the surrounding suburbs: preparation, setting out, formats, and how the stage sits between services rough-in and the finished benchtop.
Tiling the wall above the bench? That work is detailed under kitchen splashbacks.
Before a single tile is fixed
Most tiling problems are preparation problems wearing a different hat. Lipping, hollow tiles, grout that cracks along one line — each traces back to what was underneath. The surface is checked and corrected first, then tiled.
Substrate
Sheet, screed or slab
Fixing check · sheeting · primer
Boards are checked for movement and refixed where they flex, old adhesive beds are removed back to a sound surface, and everything is primed so the adhesive cures as it should rather than drying out into the board.
Levelling
Flatness, and where it matters
Levelling compound · packing · straight-edge check
Large-format tile needs a flatter bed than mosaic does, because a long tile bridges a dip and lifts at the corner. Floors in older Malvern homes are rarely true, so levelling is priced as part of the work rather than discovered halfway through it.
Waterproofing
Where the work requires it
Membrane · junctions · sink and laundry zones
Kitchens are not wet areas in the way a bathroom is, but sink bases, dishwasher recesses and any adjoining laundry zone are treated properly. Membrane goes on before tiling, never after, and wall-to-floor junctions are detailed while they are still open.
Movement
Perimeters left free
Perimeter gap · joint positions · flexible fill
Tiled fields expand and contract with the building around them. Perimeters and long runs are planned with movement joints in positions that fall behind the kickboard or along a natural line, not through the middle of the floor.
02
Setting out is where a tiled kitchen is won or lost
Setting out is the decision about where the first full tile sits so that the last one doesn’t finish as a 15mm sliver against the door architrave. On a floor it means centring the field on the sightline you walk in on, and balancing the cuts at both walls. On a splashback it means aligning joints with the cooktop, the window reveal and the underside of the overhead cabinets, so the eye reads one grid rather than three. Cuts are inevitable; badly placed cuts are not. The layout is marked and agreed before adhesive is mixed, which is also the moment to settle the pattern.
01
Pattern
Grid, stack bond
Square set · aligned joints · unforgiving
Joints line up in both directions and the wall reads as one calm field. It exposes any variation in tile size or substrate flatness instantly, so it belongs on a well-prepared surface with a consistent tile.
02
Pattern
Brick bond
Half or third offset · forgiving · familiar
Offsetting each row absorbs small differences between tiles and softens a long run. A third offset suits longer formats, where a half offset can lip at the centre of the tile below.
03
Pattern
Herringbone
45° or 90° · cut-heavy · directional
Angled laying pulls the eye along a run and gives a small splashback real presence. It takes more setting out and more cuts, so the centre line and the perimeter are established first.
04
Pattern
Vertical stack
Stacked column · height · narrow runs
Turning the tile upright lifts a shallow wall between bench and overheads. It suits the narrow galley kitchens common through Malvern East and Prahran, where the splashback is read from a step away.
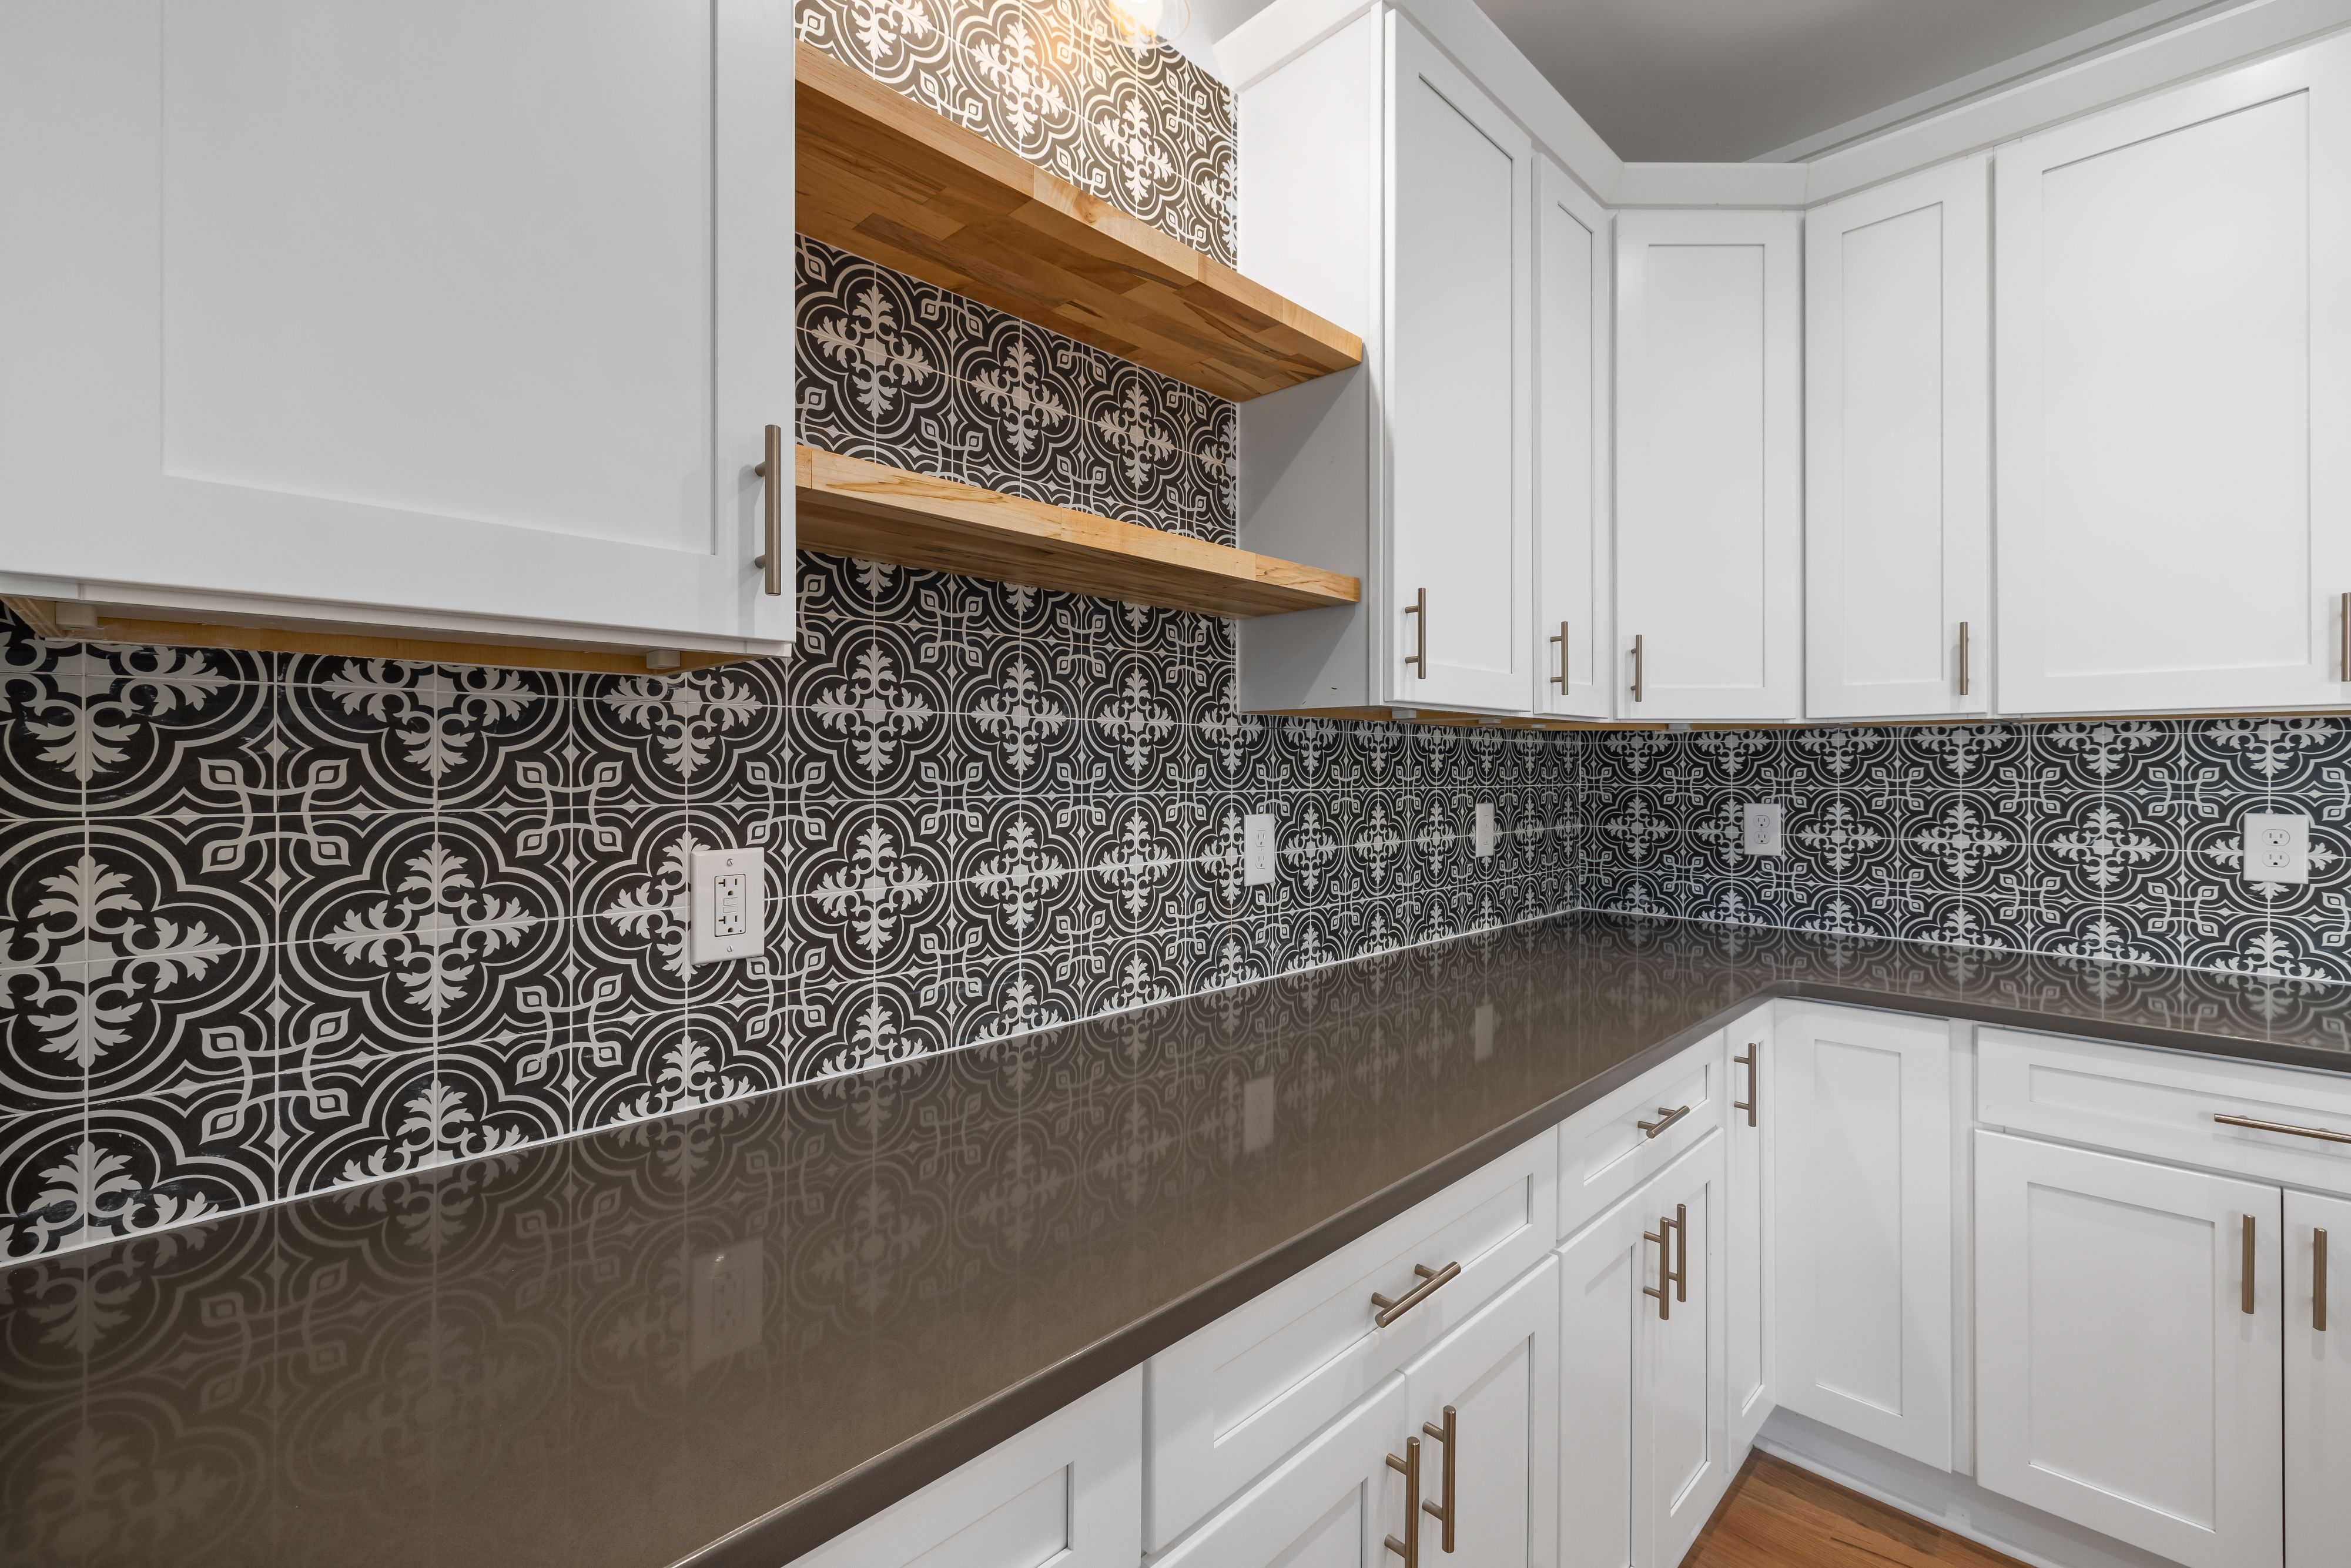
Reference photograph · patterned wall tile, set out so the grout joints run true to the cabinetry and the shelf line above the bench
From zellige to large-format porcelain
Handmade and zellige. Irregular edges, pooled glaze and visible colour variation. The character is the point, so joints are set wider and the wall is accepted as a textured surface rather than a flat one. Best kept to a defined panel where the movement can be seen.
Ceramic subway and rectangles. Consistent, quick to lay and easy to replace years later. The decision that changes the result is grout colour: matched grout reads as one surface, contrasting grout draws the pattern.
Mosaic sheets. Useful on curves, returns and shallow splashbacks. More grout line per square metre, which means more texture and more cleaning, so it works best above the bench rather than underfoot.
Large-format porcelain. Fewer joints, hard-wearing and stable underfoot. It demands a flat, well-prepared bed and careful handling, and it is the format that most often carries a stone look across both floor and wall.
Natural stone tile. Marble, limestone and travertine bring depth no print reproduces, with sealing and a little more care in return — the same trade-off covered on kitchen benchtops.
Samples are viewed against the cabinet front and benchtop together, in the light of the room, at the material selection stage of the renovation process — never against a showroom wall alone.

Reference photograph · a mosaic sample held against an existing subway wall — format, tone and grout width compared in place
Where tiling falls in the twelve stages
After removal and demolition — the floor is exposed, old tile beds are assessed and the scars left by removed walls or cabinets become visible.
After services preparation — plumbing, gas and power are roughed in and any floor penetrations are finished, so nothing is chased back through new tile.
Before cabinetry — floor tiling is usually laid first so joinery sits on the finished level and appliances can be removed later without a step.
After benchtops — wall tiling follows the installed benchtop, because the first course sits on a real edge rather than a predicted one.
Before appliances and finishing — grout, joints and silicone are completed, then the cooktop, rangehood and hardware go back in.
Tiling in a complete kitchen renovation is programmed around the joinery dates; as part of a makeover it is often the wall only.
Grout, joints and the last 5%
Grout
Colour is a design decision
Joint width · tone · cleanability
Grout tone shifts the whole wall. A close match dissolves the pattern into a single surface; a step darker draws every joint. Behind a cooktop, a slightly deeper tone stays looking right for longer.
Movement joints
Planned, then hidden
Perimeters · long runs · internal corners
Flexible joints are placed where the floor meets walls and where a long field needs relief, positioned so they disappear under the kickboard or fall on a threshold line.
Silicone
Every junction, no grout
Bench-to-wall · internal corners · around penetrations
The line where tile meets benchtop moves slightly with the seasons and with use. It is siliconed, not grouted, and colour-matched so it reads as a shadow rather than a repair.
Asked at selection
Questions that come up once the floor is open
Should the floor tile run under the cabinets?
Running the tile through gives a continuous floor, lets the dishwasher slide in and out without a lip, and means a future layout change doesn’t leave a bare patch. Tiling up to the cabinet line uses less tile and suits a kitchen keeping its existing footprint. The choice is made at design stage, because it changes both the quantity and the finished bench height by a few millimetres.
Can wall tiling be done before the benchtop goes in?
It is better not to. The benchtop is templated off the installed cabinetry, so its finished height and edge line are only certain once it is fitted. Tiling afterwards means the bottom course sits on the real surface and the silicone joint closes cleanly.
Can we tile over the existing tiles?
Sometimes. The existing surface has to be sound, well adhered, flat and correctly primed, and the added height has to work at door thresholds and any adjoining floor. Where those conditions aren’t met, removal is the shorter route to a floor that stays put.
Do I have to re-tile the floor if the layout isn’t changing?
Not necessarily. An intact floor in good condition can stay, protected through the works. Once walls move or cabinetry footprints change — the usual outcome of kitchen remodelling — patched tile rarely matches, and a new floor is the cleaner result.
Tell us the room and we'll set out the tiling
Send the dimensions, the existing floor and what you’d like above the bench. Tiling can be quoted on its own or as one stage of a wider renovation across Malvern, Armadale, Toorak, Glen Iris and the surrounding suburbs.
Prefer to ask a question first? Use the contact form.